Introduction
Coming from the land of WordPress some odd years ago, I got used to the idea of custom fields and post types and such. I needed to heavily customize my client’s cart with all sorts of custom data I proposed. Shopify won’t allow you to create data types, metafields didn’t quite fit the bill, and I didn’t want to use third party apps to create functionality. So, I settled with building out static and dynamic sections for themes.
A section in Shopify is a liquid template that can handle various liquid tags, filters, schemas and can be added to any part of your theme. There are static sections and dynamic sections. Static sections are sections that are manually included into your theme by an include tag. Dynamic sections are sections that can be added by the Shopify Theme Editor. In both dynamic and static sections, sections can hold settings and fields. Sections can also hold blocks, which are individual groups of information that contain their own settings.
In this tutorial, I’ll be showing you how to build static sections into your themes and pages to display easily editable data with blocks, in this case a list of distributors.
*Note: This tutorial assumes your using a sectioned theme such as “Debut” or “Venture”
Step 1: Create the Static Section
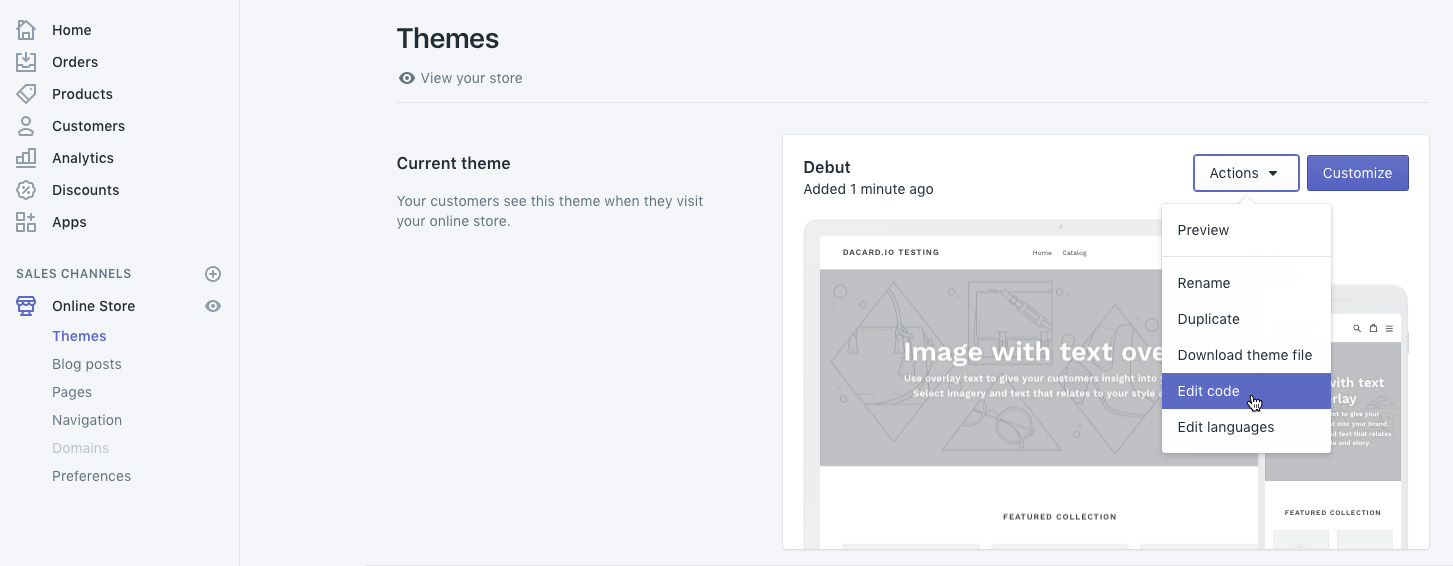
In the admin area of Shopify, go into your Themes and navigate to Edit Code to begin.

Go into the Sections folder of your theme, and add a section. Title it “distributors” and add the following static HTML table to the newly created “distributors.liquid” file (please do not delete schema area):
<table class="table">
  <thead>
    <tr>
      <th>ID</th>
      <th>Name</th>
      <th>Address</th>
      <th>Phone</th>
    </tr>
  </thead>
  <tbody>
    <tr>
      <td>001</td>
      <td>Testing LLC.</td>
      <td>123 Sample St, Miami, FL</td>
      <td>(954) 098-7654</td>
    </tr>
  </tbody>
</table>
Step 2: Add Section to Page
Now that the section is created, you need to include it onto the page template. While in Shopify’s code editor, find the Templates folder, and add a new template called “distributors” based on the already existing “page” template.

Include the section inside your new "distributors" by adding the following:
{% section 'distributors' %}into your page template file like so:
<div class="page-width">
  <div class="grid">
    <div class="grid__item medium-up--five-sixths medium-up--push-one-twelfth">

      <div class="section-header text-center">
        <h1>{{ page.title }}</h1>
      </div>

      <div class="rte">
        {{ page.content }}
      </div>

      <div class="rte">
        {% section 'distributors' %}
      </div>

    </div>
  </div>
</div>
Now create a new page in Shopify to view your custom section in action. Go into Online Store, navigate to Pages, and select the "distributors" template to use the page along with the section you created.

Step 3: Add settings/fields to section
Now that we have the section showing, let’s allow the creation and deletion of list items from the distributor’s list. In order for this to happen, every section must have a declared “Schema” (which is already added by default to the bottom of the section's code) to hold settings and information. Lets start by setting basic information for our section in the schema.
{% schema %}
  {
    "name": "Distributors",
    "settings": []
  }
{% endschema %}
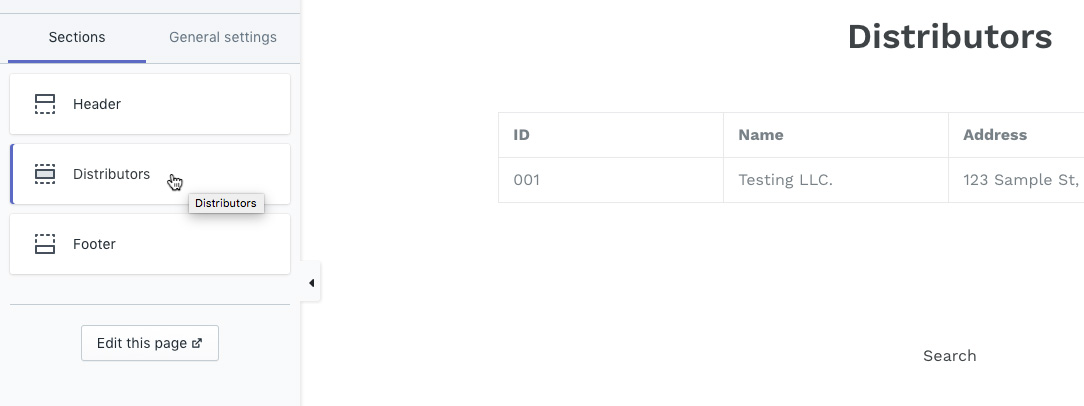
Now when customizing the theme, you will now see that the section is available in the page (But its missing settings and fields)

Let’s now add the ability add blocks to be edited (For more in-depth information on section schemas, visit Shopify documentation here), with different fields:
{% schema %}
  {
    "name": "Distributors",
    "settings": [],
	"blocks": [
		{
			"type": "text",
			"name": "Distributor",
			"settings": [
				{
                  "type": "text",
                  "id": "name",
                  "label": "Name"
                },
				{
                  "type": "text",
                  "id": "address",
                  "label": "Address"
                },
				{
                  "type": "text",
                  "id": "phone",
                  "label": "Phone"
                }
			]
		}
	]
  }
{% endschema %}
Now we need to add information to this section. This can be done by adding blocks, which can be used to loop through and output the information onto the section. Let us add a few blocks so we can test out the functionality in the next section.

Step 4: Plugging it all in
Now lets iterate through the blocks we created to display information on our site using a for tag in liquid. Add the
<table class="table">
  <thead>
    <tr>
      <th>ID</th>
      <th>Name</th>
      <th>Address</th>
      <th>Phone</th>
    </tr>
  </thead>
  <tbody>
    {% for block in section.blocks %}
    <tr>
      <td>{{ block.settings.id }}</td>
      <td>{{ block.settings.name }}</td>
      <td>{{ block.settings.address }}</td>
      <td>{{ block.settings.phone }}</td>
    </tr>
    {% endfor %}
  </tbody>
</table>
Refresh the front-end of your shop and you can now see that its iterating through the blocks you added to the section.
Conclusion
Now you'll be able to add static sections to your themes. This distributor list we created is a simple example, but can be expanded to more scenarios such as a staff area, or list of downloadable PDF documents, etc. Next tutorial will cover dynamic sections, which are sections that we can add easily add to a theme with the Shopify Theme Editor.
Refer to these pages of the Shopify documentation for more information on theme sections and blocks: